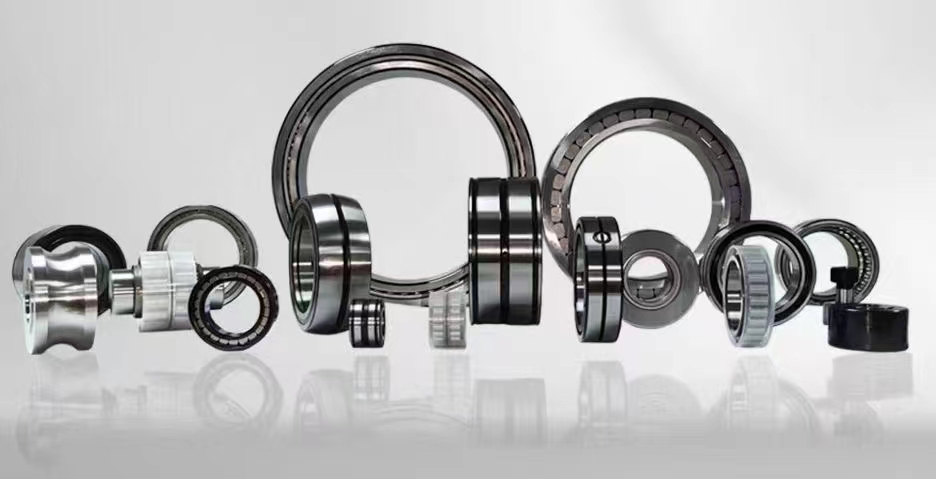
How to Diagnose and Replace a Failing Throwout Bearing Clutch in Your Manual Transmission
The throwout bearing clutch is a critical component in manual transmission vehicles, responsible for disengaging the clutch when you press the pedal. This small but vital bearing pushes against the pressure plate fingers to separate the engine from the transmission, allowing smooth gear changes. When it fails, you will hear a distinct chirping or grinding noise when the clutch is engaged. Understanding how this bearing works and recognizing early failure signs can save you from costly transmission repairs. In this guide, we cover everything from symptoms to complete replacement procedures for the throwout bearing clutch system.
1、clutch release bearing noise
2、throwout bearing symptoms
3、how to replace throwout bearing
4、clutch pilot bearing
5、clutch fork and throwout bearing
6、throwout bearing vs pilot bearing
7、clutch slave cylinder and throwout bearing
1、clutch release bearing noise
Clutch release bearing noise is one of the most common indicators of a failing throwout bearing. This noise typically manifests as a high-pitched chirping, squeaking, or grinding sound that changes when you depress the clutch pedal. When the bearing is in good condition, it rotates silently against the pressure plate fingers. However, as the internal lubricant degrades or the bearing surfaces wear down, friction increases dramatically. The noise is most noticeable when the clutch is partially engaged, such as when you are sitting at a stoplight with the engine running and the transmission in neutral. If you press the clutch pedal slightly, the noise may change pitch or disappear temporarily. This occurs because the bearing is under varying loads depending on pedal position. Ignoring this noise can lead to catastrophic bearing failure, where the bearing seizes or disintegrates. When that happens, metal fragments can contaminate the clutch assembly, damaging the pressure plate, clutch disc, and even the transmission input shaft. In severe cases, the bearing cage can break apart, causing the clutch to become stuck in the engaged or disengaged position. This leaves you stranded with a non-functional vehicle. Mechanics recommend addressing clutch release bearing noise immediately upon detection. Replacement typically requires removing the transmission, making it a labor-intensive job. However, catching it early means you only replace the bearing rather than the entire clutch kit. Many DIY enthusiasts mistake this noise for a worn clutch disc or a bad pilot bearing. A simple diagnostic test involves listening carefully: if the noise stops when you fully depress the clutch, it is likely the throwout bearing. If the noise continues or worsens when the pedal is pressed, the pilot bearing may be the culprit. Proper diagnosis saves time and money.
2、throwout bearing symptoms
Recognizing throwout bearing symptoms early can prevent a complete clutch failure. The first and most obvious symptom is a noise that changes with clutch pedal operation. As mentioned, a chirping or grinding sound when the clutch is engaged but the transmission is in neutral is a classic sign. Another symptom is a vibration felt through the clutch pedal when you press it. This vibration indicates that the bearing is no longer spinning smoothly and may have damaged races or balls. A stiff or hard clutch pedal can also point to a failing throwout bearing. When the bearing binds or seizes, it creates excessive resistance, making the pedal feel heavy or notchy. In some cases, you may notice that the clutch engages or disengages at a different point than usual. This happens because the bearing is not moving freely along the transmission input shaft sleeve. Fluid leaks near the clutch area are another symptom to watch for. While not directly from the bearing itself, a leaking clutch slave cylinder can contaminate the bearing with brake fluid, accelerating its wear. If you see fluid on the ground near the transmission bell housing, inspect the slave cylinder and throwout bearing immediately. A burning smell can also accompany a failing bearing. The excessive friction generates heat, which can burn the clutch disc or pressure plate surfaces. Finally, difficulty shifting gears, especially into reverse or first gear, may indicate that the throwout bearing is not fully disengaging the clutch. This leaves the clutch partially engaged, making gear engagement rough or impossible. Documenting these symptoms helps mechanics diagnose the issue accurately. If you experience multiple symptoms simultaneously, the bearing is likely near the end of its service life. Proactive replacement is always cheaper than emergency repairs on the side of the road.
3、how to replace throwout bearing
Learning how to replace throwout bearing is essential for any DIY mechanic working on manual transmissions. The process is complex but manageable with the right tools and patience. First, safely lift the vehicle and support it on jack stands. Disconnect the battery negative terminal to prevent accidental starting. Drain the transmission fluid to avoid spills when removing the driveshaft. Remove the driveshaft from the rear differential and transmission output shaft. Mark the orientation of the driveshaft for reinstallation. Next, disconnect the shift linkage from the transmission. For cable-operated transmissions, remove the shift cables. For rod-type linkages, disconnect the rods. Remove the starter motor to access the bell housing bolts. Support the transmission with a transmission jack or floor jack with a wood block. Remove the transmission mount and crossmember. Lower the transmission slightly to access the upper bell housing bolts. Remove all bell housing bolts, then carefully slide the transmission away from the engine. The throwout bearing is located on the clutch fork inside the bell housing. Remove the clutch fork retaining clip and slide the bearing off the fork. Inspect the input shaft sleeve for wear or grooves. If damaged, replace the sleeve or the entire transmission front bearing retainer. Clean the bell housing interior thoroughly. Apply a thin layer of high-temperature grease to the input shaft sleeve and the clutch fork pivot point. Install the new throwout bearing onto the clutch fork, ensuring it clips securely. Reinstall the clutch fork and bearing assembly into the bell housing. Align the clutch disc with an alignment tool if you are also replacing the clutch kit. Reinstall the transmission by sliding it onto the input shaft, taking care not to damage the clutch disc. Tighten all bell housing bolts to manufacturer specifications. Reinstall the starter, shift linkage, driveshaft, and crossmember. Fill the transmission with the correct fluid. Finally, reconnect the battery and test the clutch operation. Bleed the hydraulic system if your vehicle uses a hydraulic clutch. Test drive the vehicle to confirm proper operation and listen for any new noises. Remember to replace the pilot bearing and release bearing simultaneously for best results.
4、clutch pilot bearing
The clutch pilot bearing works in conjunction with the throwout bearing but serves a different function. Located in the center of the crankshaft or flywheel, the pilot bearing supports the transmission input shaft tip. While the throwout bearing handles clutch disengagement, the pilot bearing ensures the input shaft rotates smoothly with the engine when the clutch is engaged. A failing pilot bearing produces a grinding or whirring noise that continues even when the clutch pedal is fully depressed. This is a key diagnostic difference from a bad throwout bearing, which typically goes silent when the pedal is pressed. The pilot bearing is often overlooked during clutch replacement, but replacing it is strongly recommended. The cost of the bearing is minimal compared to the labor required to access it. If the pilot bearing fails after a clutch replacement, you must remove the transmission again. Common failure modes include seized bearings that prevent the input shaft from spinning, causing difficult shifting or transmission damage. Worn bearings create excessive play, leading to vibration and noise. Some pilot bearings are sealed units that require no maintenance, while others are bushing-type that rely on oil splash. Always check your vehicle service manual for the correct type. When installing a new pilot bearing, use a proper installation tool to avoid damaging the bearing or crankshaft bore. Never hammer the bearing directly as this can distort the races. Some vehicles use a needle roller bearing, while others use a bronze bushing. Each requires specific installation procedures. The pilot bearing and throwout bearing should always be replaced together as a set. This ensures both components have equal service life and reduces the risk of premature failure. Neglecting the pilot bearing during a throwout bearing replacement is a common mistake that leads to customer comebacks and additional labor costs.
5、clutch fork and throwout bearing
The clutch fork and throwout bearing form a mechanical linkage that translates pedal movement into bearing motion. The clutch fork is a pivoting lever that pushes the throwout bearing against the pressure plate fingers. Understanding this relationship is crucial for proper installation and troubleshooting. The fork pivots on a ball stud inside the bell housing. A retaining clip or spring holds the throwout bearing onto the fork fingers. When you press the clutch pedal, the hydraulic system pushes the slave cylinder rod, which moves the fork. The fork then slides the bearing forward along the input shaft sleeve. If the fork is bent, cracked, or worn at the pivot point, the bearing cannot move evenly. This causes uneven pressure on the pressure plate fingers, leading to premature bearing wear and clutch chatter. Inspect the fork for wear marks, cracks, or deformation during any clutch service. The pivot ball stud should also be inspected for wear. Some vehicles use a plastic pivot socket that can melt or crack from heat. Replace these with metal or high-temperature versions for durability. The fork-to-bearing contact points should be lightly greased with high-temperature bearing grease. Too much grease can contaminate the clutch disc, while too little causes premature wear. The clutch fork pivot should also be greased to prevent squeaking and binding. In hydraulic clutch systems, the slave cylinder rod tip contacts the fork. Ensure this contact point is smooth and lubricated. Some aftermarket performance clutches include upgraded forks made from billet steel or chromoly. These resist flexing under high clamping loads. For high-horsepower applications, a heavy-duty throwout bearing and fork combination is recommended. The stock components may fail under increased loads. Always verify that the fork and bearing are compatible with your specific clutch kit. Mismatched components can cause improper engagement or disengagement.
6、throwout bearing vs pilot bearing
Understanding the difference between throwout bearing vs pilot bearing helps in accurate diagnosis and repair. As explained, the throwout bearing disengages the clutch, while the pilot bearing supports the input shaft. Their failure symptoms differ significantly. The throwout bearing makes noise only when the clutch is engaged or partially engaged. The pilot bearing makes noise continuously when the engine is running and the clutch is engaged. If you press the clutch pedal and the noise stops, it is likely the throwout bearing. If the noise continues or gets worse, it is likely the pilot bearing. Another difference is in feel. A bad throwout bearing can cause pedal vibration or stiffness. A bad pilot bearing causes input shaft vibration that you may feel through the shifter. The replacement procedures also differ. The throwout bearing is accessible once the transmission is removed and sits on the clutch fork. The pilot bearing is pressed into the crankshaft or flywheel and requires a puller for removal. Many mechanics replace both bearings during a clutch job because the labor is the same. The cost of the bearings is small compared to the transmission removal labor. Some vehicles use a pilot bushing instead of a bearing. Bushings are simpler but wear faster. They require more frequent replacement. In terms of durability, sealed ball bearings last longer than bushings but can fail if contaminated. The throwout bearing is more exposed to heat and debris from the clutch, making it more prone to failure. The pilot bearing is protected inside the flywheel but can fail from lack of lubrication. Always follow the manufacturer's recommendations for replacement intervals. Some high-performance applications use ceramic or hybrid bearings for better heat resistance. For daily drivers, standard OEM-grade bearings are sufficient. The key takeaway is that these two components work together but fail differently. Accurate diagnosis prevents unnecessary parts replacement.
7、clutch slave cylinder and throwout bearing
The clutch slave cylinder and throwout bearing work together in hydraulic clutch systems. The slave cylinder converts hydraulic pressure from the master cylinder into mechanical force to move the clutch fork. This force then pushes the throwout bearing against the pressure plate. When the slave cylinder fails, the throwout bearing may not receive enough force to disengage the clutch fully. This causes difficult shifting and clutch drag. Slave cylinder failure modes include internal bypass, external leaks, or complete seizure. A leaking slave cylinder can spray brake fluid onto the throwout bearing. Brake fluid acts as a solvent and washes away the bearing's internal grease. This accelerates bearing wear and leads to premature failure. Therefore, a leaking slave cylinder often damages both components simultaneously. Many mechanics recommend replacing the slave cylinder and throwout bearing together. Some vehicles use a concentric slave cylinder that surrounds the input shaft and directly pushes the bearing. This design eliminates the clutch fork entirely. Concentric slave cylinders are common in modern vehicles but are more expensive to replace. They also require more careful bleeding during installation. When replacing a conventional slave cylinder, inspect the pushrod for wear and the mounting bolts for tightness. The slave cylinder should be bled properly to remove air from the hydraulic system. Air in the system causes a spongy pedal and incomplete clutch disengagement. This puts extra load on the throwout bearing as it tries to disengage a partially loaded clutch. For vehicles with external slave cylinders, the bleed screw location varies. Always consult the service manual for the correct bleeding procedure. Some aftermarket slave cylinders feature a bleeder hose that makes the process easier. In summary, the slave cylinder and throwout bearing are interdependent. A problem with one often leads to problems with the other. Replacing them as a pair ensures reliable clutch operation and prevents future failures. Always use quality parts and proper installation techniques for best results.
This comprehensive guide has covered seven critical aspects of the throwout bearing clutch system, from diagnostic noise identification to complete replacement procedures. You have learned how to differentiate between throwout bearing and pilot bearing failures, understand the role of the clutch fork, and recognize the importance of the slave cylinder. Each component plays a vital role in ensuring smooth clutch operation. By understanding these interrelated parts, you can diagnose issues accurately and perform repairs with confidence. Whether you are a professional mechanic or a dedicated DIY enthusiast, this knowledge helps you avoid common mistakes and costly comebacks. Remember that proactive maintenance and early intervention are key to extending the life of your clutch system. Regular inspection of the throwout bearing during transmission service can prevent unexpected failures. Always use high-quality replacement parts and follow manufacturer torque specifications. With proper care, your throwout bearing clutch system will provide years of reliable service. If you experience any of the symptoms described, do not delay. Address the issue promptly to avoid further damage to your transmission and clutch components. Safe driving starts with a properly functioning clutch system.



 8613869596835