What Every Mechanic Must Know About Clutch Pilot Bearings
Clutch pilot bearings are small yet crucial components found in manual transmission vehicles. Located in the center of the flywheel or crankshaft, they support the transmission input shaft, ensuring smooth alignment and operation during clutch engagement and disengagement. Without a properly functioning pilot bearing, gear shifting can become difficult, noisy, or even impossible. Understanding its role, common failure signs, and replacement procedures is essential for any mechanic or DIY enthusiast working on vehicle drivetrain systems.
1、clutch pilot bearing symptoms2、pilot bearing replacement cost
3、clutch pilot bearing installation
4、transmission pilot bearing types
5、how to remove pilot bearing
1、clutch pilot bearing symptoms
Recognizing the symptoms of a failing clutch pilot bearing early can save you from more extensive and expensive transmission repairs. One of the most common indicators is a persistent chirping or squealing noise that occurs when the clutch pedal is pressed and released. This noise often emanates from the bellhousing area and may change in pitch as engine speed varies. Another prominent symptom is difficulty shifting gears, particularly when engaging first gear or reverse. The pilot bearing's job is to allow the transmission input shaft to spin independently of the engine when the clutch is disengaged. When it wears out, the shaft may not decouple properly, causing grinding or resistance during gear changes. Vibration felt through the clutch pedal or the floorboard is another red flag. As the bearing deteriorates, it can create an imbalance that transmits vibration into the cabin. In advanced cases, the bearing may seize entirely, leading to a complete loss of clutch function or damage to the transmission input shaft. Mechanics should also watch for clutch chatter during engagement, as a worn pilot bearing can cause uneven pressure plate contact. If left unaddressed, a failed pilot bearing can score the flywheel surface, damage the pressure plate fingers, or even break apart, sending metal debris into the transmission. Regular inspection during clutch replacement is the best preventive measure. Always check for play in the bearing and listen for unusual noises during a test drive. Ignoring these symptoms can turn a simple bearing swap into a full transmission overhaul, significantly increasing labor and parts costs.
2、pilot bearing replacement cost
Understanding the pilot bearing replacement cost is important for budgeting both professional repairs and DIY projects. The part itself is relatively inexpensive, typically ranging from 5 to 30 dollars depending on the vehicle make and model. However, the labor cost can be substantial because accessing the pilot bearing requires removing the transmission. In a professional shop, expect to pay between 200 and 600 dollars for the entire job, with labor accounting for the majority of the expense. For example, a front-wheel-drive vehicle often demands more labor hours due to cramped engine bay access, pushing costs toward the higher end. Rear-wheel-drive vehicles are generally easier to work on, so labor may be lower. Some high-performance or luxury vehicles may have specialty bearings that cost more, sometimes exceeding 100 dollars for the part alone. If the pilot bearing is integrated into the flywheel or crankshaft, replacement may require additional components, further increasing the total. DIY enthusiasts can save significantly, as they only need to purchase the bearing and possibly a removal tool kit, which costs 20 to 50 dollars. However, DIY replacement requires mechanical skill, proper tools like a slide hammer or puller, and sometimes a transmission jack. The hidden cost of DIY is the time investment, which can range from four to eight hours for a first-timer. It is also wise to replace the clutch kit, pressure plate, throwout bearing, and resurface or replace the flywheel while the transmission is out, as this avoids future labor redundancy. Many mechanics recommend bundling these services to maximize value. Ultimately, while the pilot bearing itself is cheap, the labor makes it a moderate-cost repair that should not be delayed once symptoms appear.
3、clutch pilot bearing installation
Proper clutch pilot bearing installation is critical for long-term drivetrain reliability and smooth shifting. The process begins with thoroughly cleaning the bore in the flywheel or crankshaft where the bearing will sit. Any dirt, rust, or old bearing fragments can prevent proper seating and cause premature failure. Always use a pilot bearing removal tool or a slide hammer to extract the old bearing without damaging the surrounding metal. Once the bore is clean, apply a thin layer of high-temperature grease to the outside of the new bearing to ease installation and prevent corrosion. Never grease the inside of the bearing unless specified by the manufacturer, as excess lubricant can contaminate the clutch disc. For press-fit bearings, use a driver tool that matches the outer diameter exactly. Tap the bearing gently and evenly into place until it is fully seated flush with the flywheel surface or slightly recessed. Do not hammer directly on the bearing race, as this can deform the rollers or balls. For pilot bushings made of bronze or oil-impregnated material, the installation is similar but requires extra care to avoid galling. Some modern vehicles use needle roller bearings, which must be installed with the correct orientation to ensure proper rotation. After installation, check that the bearing spins freely without binding. Then, use a clutch alignment tool to center the clutch disc before bolting on the pressure plate. This step ensures the transmission input shaft aligns perfectly with the pilot bearing. Torque all pressure plate bolts to manufacturer specifications in a star pattern. Finally, when reinstalling the transmission, support it with a jack and guide the input shaft gently into the pilot bearing. Forcing the shaft can damage the bearing or the transmission splines. A successful installation results in quiet operation, smooth clutch engagement, and effortless gear changes.
4、transmission pilot bearing types
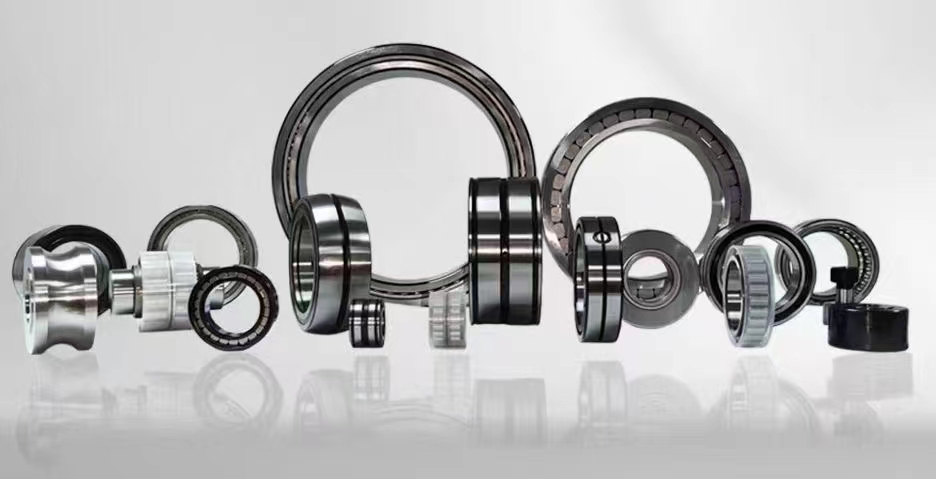
There are several transmission pilot bearing types, each designed for specific applications and performance requirements. The most common type is the ball bearing, which consists of steel balls held between inner and outer races. Ball bearings handle radial and moderate axial loads well and are found in many passenger vehicles. Needle roller bearings are another popular type, featuring thin cylindrical rollers that provide high load capacity in a compact space. They are often used in high-torque applications like trucks and performance cars because they reduce friction and support heavy loads. Bronze bushings, also called pilot bushings, are a simpler and cheaper alternative. They are made from oil-impregnated bronze and rely on a thin film of lubricant for operation. These bushings are common in older vehicles and some budget-friendly modern cars. However, they wear faster and can cause noise when dry. Ceramic hybrid bearings combine ceramic balls with steel races, offering reduced weight, higher heat resistance, and longer service life. They are found in racing and heavy-duty applications where reliability under extreme conditions is essential. Some vehicles use a combination bearing that integrates a roller bearing with a bushing for specific load distribution. The choice of pilot bearing depends on factors like engine torque, transmission weight, operating temperature, and cost constraints. Aftermarket performance bearings often feature upgraded materials like hardened steel or sealed designs to keep contaminants out. Sealed bearings require no maintenance but may have slightly higher rotational resistance. Conversely, open bearings allow for lubrication but are more vulnerable to dirt. When replacing a pilot bearing, always consult the vehicle service manual to select the correct type and size. Using the wrong type can lead to premature wear, noise, or even transmission damage. Understanding these types helps mechanics make informed decisions for repairs and upgrades.
5、how to remove pilot bearing
Learning how to remove pilot bearing efficiently is a valuable skill for any mechanic, as the process can be tricky without the right technique. The first step is to remove the transmission and clutch assembly to access the flywheel. Once exposed, inspect the pilot bearing location in the center of the flywheel or crankshaft. For stuck bearings, apply penetrating oil around the outer edge and let it soak for 10 to 15 minutes. The most common removal method uses a slide hammer with a pilot bearing puller attachment. Insert the puller jaws behind the bearing, tighten the collet, and use the slide hammer's weight to extract the bearing with repeated impacts. This works well for most bearings but requires patience to avoid damaging the bore. Another effective technique is using a blind hole bearing puller, which expands behind the bearing to grip it firmly. For stubborn bearings, heating the flywheel area around the bearing with a torch can expand the metal and loosen the fit. Be cautious not to overheat, as this can warp the flywheel or damage the crankshaft. If the bearing is severely seized, you may need to drill small holes into the bearing race and use a chisel to break it apart. However, this method risks scoring the bore and should be a last resort. Some mechanics use a pilot bearing removal tool kit that includes a threaded rod and expanding collet, which provides controlled extraction force. For bushing-type pilot bearings, a wet paper towel or grease packing method can sometimes push the bushing out hydraulically. After removal, thoroughly clean the bore with brake cleaner and inspect it for burrs or damage. A damaged bore may require machining or replacement of the flywheel. Always wear safety glasses and work carefully to avoid injury from flying debris or tool slippage. Mastering these removal techniques ensures efficient repairs and prevents costly mistakes during clutch service.
This article has covered five critical aspects of clutch pilot bearings, including symptoms of failure, replacement costs, installation procedures, different types available, and removal techniques. Recognizing early warning signs like chirping noises or shifting difficulty can prevent major transmission damage and save money. Understanding the cost breakdown helps you decide between professional service and DIY repair. Proper installation ensures the bearing seats correctly and aligns with the transmission input shaft, while knowledge of bearing types allows you to choose the best option for your vehicle. Finally, mastering removal methods prepares you to handle even stubborn bearings without damaging surrounding components. Whether you are a professional mechanic or an enthusiast, these insights will help you maintain a reliable and smooth-operating clutch system for years to come.
We hope this comprehensive guide has provided you with actionable knowledge about clutch pilot bearings. From identifying early symptoms to mastering installation and removal, these skills are essential for any manual transmission repair. A well-maintained pilot bearing ensures smooth gear engagement, reduces drivetrain wear, and extends the life of your clutch system. If you are planning a clutch replacement, do not overlook this small but vital component. Invest in a quality bearing, follow proper procedures, and your vehicle will reward you with reliable performance. For further reading, explore our other articles on transmission maintenance and clutch system diagnostics.



 8613869596835